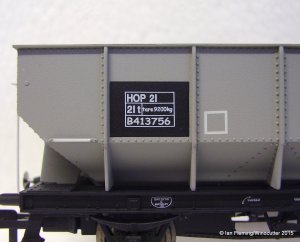
Postscript 21
I picked up a further example of the Hornby 21T hopper at the weekend, this one being one with a hybrid 1970s lettering style. As an addendum to the review post, it’s probably also fair to say that the choice of a very early example of the type as a basis (i.e. with a limited amount of end handrails, as pictured in the earlier post) wasn’t the best, as such vehicles were considerably outnumbered by those with the additional lower rail. That’s the one thing that niggles with Hornby’s research – as with the ore tippler and fish van, it seems to me that they get hold of a drawing of the original design and then don’t cross check it with the photographs that they quite obviously use for livery details, and which are often of later variations. Despite that though, I remain impressed with the model, not least because it’s a real step in the right direction for them.
Although I’ve no doubt the model will be purchased by folk who don’t know and don’t care (and good luck to them), strictly speaking this hybrid combination of features ties it down to a fairly narrow window from the mid- to late-1970s. The metric tare weight, small ‘T’ to the ’21t’, yet combined with lack of TOPS code, suggests the wagon was relettered between 1974 and 1976, and could conceivably have run like this for maybe another five years. Looking at the original of the pic this is based on, I’d also guess that box to the right of the lettering was applied later, as it has no black background and the underlying grey looks fresher than the rest of the wagon.
I think the most curious thing though is the actual running number. Whilst the other elements are pretty convincing as a ‘not quite standard’ job, the number looks suspiciously like the computer font Comic Sans. No matter though; whilst I often buy a particular RTR model because of the style of the factory lettering, I still tend to customise one or two elements to help lose that ‘obviously RTR’ look. And 21T hoppers, having all those separate panels, do offer a lot of scope for variegated rusting effects…
Discussion of that mysterious empty box is a small way perhaps of tying together the model aspect of the hobby with a deeper insight into the prototype, in the way I tried to do 15 – 20 years ago. Theories abound on the rationale behind this box, some more sound than others but I’m fairly happy myself that it represents the visible of an abortive speed classification system.
Some years ago, when life was just an endless quest for knowledge, the idea of carrying out primary research in the NRM took hold. Now the thing with this, as anyone who’s tried it will know, is that the information held by the museum is only a fraction of the wealth of railway knowledge, and that only a fraction of that fraction is catalogued and available for study. (As an aside, it did quite amuse me to see one particular personality in the hobby claim recently that he spent a lot of time doing just that). But anyway, something I came across, in that ‘wasn’t really looking for this but then I didn’t know what was looking for’ way, was the minutes of the BR Wagon Standards Subcommittee. To set this in context, BR was undoubtedly an organisation run by committees, and it’s evident from these minutes not only that there were other committees involved just in the field of wagons, but that there also seems to have been some crossover in what they discussed.
The minute that concerns us here is 5821 of 28.2.63, headed ‘Speed Classification of Rolling Stock’. It prefaces itself with the following:
The Chairman referred to discussions which had been held with the Operating Department regarding the painting, on all freight stock, of a code figure to indicate the class of train in which each vehicle can be permitted to run, in relation to its maximum permitted speed. This code figure would supersede existing “XP” and “Star” markings
I won’t set out the full table or the list of vehicles but basically there are eight numbered categories. Of these, 1 is the highest, relating to 75mph-rated stock deemed suitable for passenger or freight work. There are two 60mph ratings, 2, to include passenger work and 3, which doesn’t. After that the increments descend in 5mph steps, some mentioning fitted freight work, some partly fitted and some not at all, thereby implying they were unfitted. 8 is the lowest category and is a 35mph rating.
An accompanying minute, 5998 of 7.11.63, defines a ‘classification panel’ that would ‘contain the speed classification number’. It goes on to say that this should be set ‘six inches to the right of the Traffic Panel’ (this being the familiar ‘box’ containing tonnage, running number and very often a type code, as seen on the Hornby model). Looking at the timing of these minutes, it doesn’t take a genius to work out that this must all have been tied in with what’s generally referred to as the 1964 wagon livery and lettering changes.
Photographic evidence of vehicles carrying these figures isn’t common, but one that I’m aware of is the 2, which is applicable to 10ft wheelbase vans which would otherwise have been marked XP, and which I’ve seen on BR Vanwides. It seems likely to me that with speeds increasing, thoughts looking towards higher speed air braked stock and increasing concern over short wheelbase stock in general, that the scheme lapsed and that the old XP differentiation held sway a while longer. It’s certainly not unusual to see fitted stock with the XP in the box, and it’s a logical enough place for it, but as to why the box would be applied without anything in it is harder to explain. But applied it was, to all sorts of unfitted wagons and not a few fitted ones as well, and it would be easy to think that it was a convenient way of making the point that the wagon wasn’t XP rated.
Filed under Mineral wagons, Rust effects, Hoppers
Coals to Newcastle
Over recent years Hornby have come in for a fair amount of flak for their wagon models and indeed, it’s not so long since I was passing judgement here on their unfortunate Blue Spot fish van. Now whilst they arguably still have a fair way to go in restoring confidence (not least with retailers in my view, though this isn’t the place to open that particular can of worms), I do believe in giving credit where it’s due by saying that the various models now emerging from the pipeline seem to have shaken off the silliest aspects of the much maligned ‘design clever’ phase.
Broadside of the new model. This is the side that correctly doesn’t have any brakegear apart from the hand lever; I haven’t seen any forumites complaining theirs has bits missing, yet…
Announced just before Christmas and now, unexpectedly soon, in the shops, their LNER 21 ton coal hopper is an example which may just be passing under the radar with such high profile loco introductions as the K1, D16 and Black Motor attracting interest. But I don’t think it’s an exaggeration to say that this little model is an example of Margate at its modern best.
For some years of course, Hornby have been churning out the old 1970s Airfix model of much the same wagon. Whilst not bad for its time, the main shortcoming with this was its combination of the riveted body with the push braked chassis that also saw use on their 20/21T PO mineral wagon and 20t tanker. The all-new model really is in a class apart from that; the body retains the commendable fineness but the chassis is spot on, replicating the distinctive single sided clap brakegear complete with catch bars, tall handbrake lever and hopper operating handles.
Probably the first thing I picked up on visually was evidence of the usual Hornby ‘prettifying’ – the form of shiny buffer heads and gleaming white footstep – but it’s all good raw material and a suitably weathered example should look the DBs. One other concern was that of weight, the lack of which could be a problem with the old Airfix model as the design of the wagon means there aren’t a lot of places to hide it. The new one isn’t super heavy, but it’s not a featherweight either, and there looks to be room for more weight in the hopper chutes if it were desired.
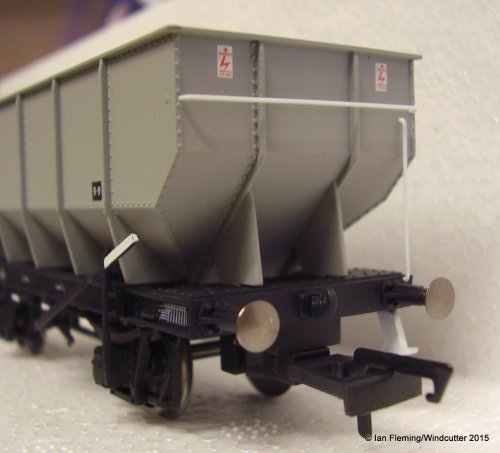
End detail of the new model. It appears to be based on the earliest builds, as later ones had an additional horizontal end handrail, bracketed out from the angled portion. When you’re used to seeing those later wagons with their cat’s cradle of handrails, the end here looks quite bare. Adding the extra bits would be a simple job, I think.
And of course, the price is an inevitable discussion topic. 15 quid at RRP, and findable for up to a quid less than that. One of the most criticised aspects of Hornby is their pricing policy, and a couple of years ago they were charging more than that for that old Airfix one; inherited tooling with its investment costs more than written off…
But anyway. For those who are keen to point out how shockingly expensive RTR is getting these days and we should all get back to kitbuilding, I don’t necessarily disagree, but I suggest you find a better example with which to promote your argument. The equivalent kit is £9.00; so if you place a value on your time, paying yourself at minimum wage means that to break even, you have to build and paint it in an hour. Good luck with that 😉
Not that I’m saying the RTR one is the answer to everything of course. A properly representative BR period hopper train would have many other variants in it – not least the welded body ones – and for which the range provided by Parkside provides pretty well. As to Hornby moving on to other variants, the only mention I’ve seen of the possibility was a passing one in Rail Express Modeller, based apparently on a conversation with Hornby. And for completeness here I should say that the Hornby Dublo and Wrenn ranges included a rendition of the BR welded wagon. It wasn’t without charm, but was quite overscale in width.
As to the prototype, it’s probably fairly well known that the 21 tonner originated as a steel version of the wooden vehicles favoured by the North Eastern Railway. The LNER bought in many thousands from the trade and the design was adopted for large scale construction by BR, together coming to represent a large part of the national fleet. I’ve never carried out any really in-depth research on them but I would make a guesstimate of there eventually being at least 35, 000 by the time construction of the BR derivatives ceased in the late ’50s. I know of no particular restriction on the LNER designs portrayed by this model, so contrary to what you may see written elsewhere, they could turn up in a hopper train anywhere that such things worked and indeed, there’s ample photographic evidence of such.
Closeup of the axleguard and brake lever detail on the new model; this is clickable for larger sizes and I suggest you do so. The axleboxes are also very slightly angled (top sloping inward), which is correct. That repair data panel is spurious on this livery, belonging to a later period, but is easily removed or painted over.
Should anyone wish to delve deeper into the type, please be aware that despite their relatively lesser numbers, they’re even more involved than the 16T mineral. An article in the much missed Model Railway Constructor by Nick Campling, Jim Johnson and Alan Cook mentions no less than 38 variations – of just the LNER wagons – having been identified. And study of the BR builds is not exactly assisted by the incorrect allocation of diagram numbers to a significant number of batches. To simplify things though and for ease of recognition, there are the following broad types of construction:
1. LNER builds with riveted bodies, single side clasp brakes and tall hand brake lever
2. LNER builds with welded bodies, single side clasp brakes and tall hand brake lever
3. LNER builds on underframes similar to above but with Continental-spec fittings
4. BR builds of type 1
5. BR builds of type 2
6. A ‘pure’ BR welded design (theoretically diagram 1/146) with more conventional 4-shoe push brakegear. This later developed into vac piped and vac braked builds, and exhibited variation in end stanchions
7. BR riveted design (diagram 1/145), the body of which was effectively a version of 1/146 but capable of being turned out by wagon builders that weren’t set up for welding. Again these had push brakes
From around 1970 BR embarked on a programme of rebodying coal-class wagons. Any of the above variants could form the donor wagon, leading to the survival of some quite old underframes into the 1980s.
A note as to batches 2 and 5: whilst it’s sometimes said these were early rebodies, I believe they were welded from new (even the E-prefixed ones, which were built by the trade anyway). As evidence, I’d cite the consistent numbering of the ones on, for instance, Paul Bartlett’s website, together with many being built by Cravens, and also that there seem to be just too many of them for any other explanation.
Filed under Uncategorized, Mineral wagons, Wagon kits, Iron ore, Hoppers
The skirl of the Pipe
Oh come on, it is at least seasonal …!
Anyhoo, a review seems appropriate, following the season of box opening on a much larger scale, and Bachmann’s 12T Pipe wagon is fairly fresh in the shops. Thing is though, this is highly likely to come out as one of those Jeremy Clarkson style reviews, where there’s a handful of words about the subject and rather more about various semi-connected subjects on which I wish to give you the benefit of my views…
There’s not a lot I can say about the prototype wagon that isn’t already fairly well known or easily obtainable from published sources. One point I will make though is that it’s not absolutely identical to the Parkside – whereas the kit is a diagram 1/460, built unfitted and later converted to vac, this new RTR vehicle is to diagram 1/462, which were VB from new. The consequent differences are acceptedly minor – a Morton clutch to the brakegear on one side, rather than the earlier drop link, and spindle buffers rather than the hydraulic jobs usual on the conversions – but still, it’s different. There were two other diagrams – 1/461 of LNER origin (of which more shortly) and 1/463, the final evolution with 8-shoe clasp brakes (this was the donor batch for what became the air braked ODAs).
Which brings in my first point. Much as I’ve loved, and still love, Parkside kits, and have a lot of time for the guys behind the outfit, I’m a little bemused by comments to the effect that the RTR firms are ‘working their way through the Parkside catalogue and should show more imagination’. But the point, surely, is that these vehicles, these chosen diagrams, are the most numerous or useful, and that both the kit manufacturer and the RTR firm are simply choosing the best commercial prospect?
In this respect, the forthcoming Tube is probably a better illustration. There are many designs of tube wagon, of GW, LMS, LNER and BR design; many look superficially similar but the LMS – BR design lineage in particular masks a continuous evolution made up of subtle differences. So when Bachmann arrived at the conclusion that they’d be best served doing the BR 1/448, the last built and longest lived, it’s really a moot point in my view whether they aped Parkside or whether they got the wagon books out and researched it themselves. In fact they probably did both, using as many sources of info as they could. I know I would.
Secondly then, the price. It’s twenty quid (or thereabouts). Yes, I know, twenty quid for a four wheel wagon (and I won’t insult your intelligence by pointing out that it’s a slightly longer than average four wheel wagon). And yes, I know the Parkside one is about eight quid, and I can do the sums to work out the difference.
But the Pipe is a more complex wagon than most probably realise, especially those who’ve contented themselves with simply building the thing out of the packet. And there’s a spinoff topic, worthy of further study – there’s almost always a difference between building an XYZ kit of a class A123, and building a model of a class A123 from the said kit. I won’t develop that theme too far here, except as an illustration of my belief that at twenty quid, the new RTR model is actually not bad value. In each and every case of comparison like this, one has to factor in one’s time; I’m not going to include the cost of paint and transfers etc in the calculation as they’re just a stock-in, as much a part of one’s hobby as tools or books. But time is the important one, and even now I can hear people saying that a Parkside kit falls together almost in minutes rather than hours.
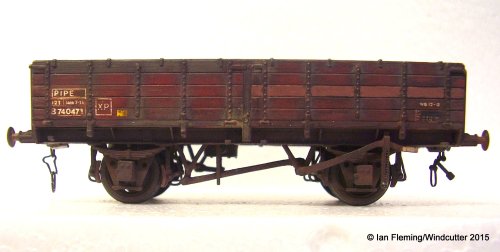
But consider this (or if you’re fed up of reading already, consider the photo above). The Pipe is not a simple open wagon. Anyone who has an appreciation of how wagons are built for the jobs they do will realise that those long drop doors make a difference. Just under the bodyside, there are ‘door controllers’ (a fancy sort of hinge), the usual triangular gusset plates to support the part of the floor that overhangs the frame, and some door bangers that are at a more precarious angle than average and are hard to secure to a kit solebar. In the middle, there’s also a box section that no doubt gives some strength to the whole structure, otherwise weakened by the full length doors.
The hand brake lever catches the look pretty well, something that’s not easy to do with a kit unless you substitute etched bits (and assuming there’s one available for the distinctive shape on this wagon). There’s also a further issue with the kit that usually escapes people: that for understandable production economy, the kit utilises the chassis parts from the 21T and 24.5T mineral kits, which means it has heavy duty axleguards (the Pipe, being a mere 12 tonner, has standard axleguards).
You don’t have to add any of this extra detail to the kit, of course – but the point is that the RTR model is sorted in all of those respects, so a simple comparison with the kit is not a fair comparison. I did two kitbuilds many years ago (part of a projected build of half a dozen, which went the way of most good intentions), and incorporating the modifications listed; even pricing my time at minimum wage, I could not build the kit to this standard for twenty quid. The pic above shows the more interesting of the pair; intended to portray the LNER derivative, it combines Parkside ends with Nu Cast sides and Parkside solebars with etched axleguards and modified ABS brakegear.
So there you are. A sort of review, another past glory, and a hell of a lot of punditry. Come at me, guys 😉
Filed under Wagon kits, Wagon weathering
Expo time
This weekend brings ExpoEM North and for the second year, I have the pleasure of being amongst the range of demonstrators there, along with my good friends Brian Sunman and Ken Gibbons. Anyone who’s been to an Expo will know the unique atmosphere they have, and we’re very much looking forward to being there and seeing what else Derek Evans has lined up. Demoing is probably less tiring than showing a layout, but that said, it can be even more difficult to see the rest of the show!
The overall theme of our little bit will be BR period modelling, and Ken will be taking an eclectic mix of projects which echo back to the spirit of Modelling the British Rail Era. Steam, diesel and very probably electric, from the ’60s to the ’90s all have a chance of making an appearance. Brian’s main focus will be on buildings for our under-construction Waverley route layout, but he will also have with him some of the Carflats that he’s been working on for the same project. This pic isn’t my best effort and the wagon needs some finishing work, but it should show the effectiveness of what is essentially a simple conversion – based on an LMS Period 1 coach underframe as so many of the prototypes were:
I shall be presiding over my usual random mix of modified RTR and kitbuilds, and will also be taking my paintbox. One particular project I’ll be giving a coat of looking at is my small fleet of grain wagons based on the Trix/Lilliput model.
The methods we use are not specific to any particular prototype or period, but that said, we recognise it’s a finescale show and will obviously slant things that way. We all have some experience in regauging locos and stock so if you’re curious about easy steps into EM, ask away. And the same goes for anything that’s on show, or even that isn’t. We’re there to talk, and don’t be put off if we look ‘busy’ or already have somebody at the table – it’s usually a case of the more the merrier 🙂
More details on ExpoEM North can be found on the Society’s own website.
Summer shortbread
This started out as another holding post, really, as things have been noticeably quiet on here. Partly this has been due to the usual pressures and diversions of life and to more pleasant things like holidays – and even with the summer we’ve had here, up until a couple of weeks ago, it’s hardly been the weather for working to deadlines.
But working to deadlines is mostly what oi aaarve been, for a commitment to take something resembling a layout to the excellent little Thirsk show, which is held on a Sunday late in July. After a slightly false start last year with thoughts on my Stoneferry Tramway project, this was to emerge as Blackhill Ferry, a micro layout based on a single platform passing station, a genre which I’ve always been fascinated by the simplicity of. The Stoneferry thing is still very much something I’d like to do, but for the future – it wasn’t long before I realised that the original micro concept as I’d envisaged it, at a mere 4’6 on its longest edge, would neither satisfy what I wanted from it nor do it justice.
They caught the last train for the coast, the day the music died…
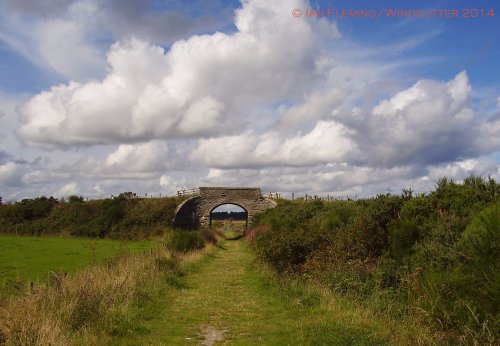
Overbridge west of Portgordon looking towards Spey Bay, August 2011
So, thoughts turned back to what was still a relatively recent infatuation with the GNoSR system, and particularly the Moray Coast line from Elgin via Buckie to Cairnie Junction. The only thing with this was that the Coast line, despite its almost ‘light railway’ character, isn’t actually well suited to minimum space interpretations! – the original idea having been for a slightly larger layout but that had kinda lost its way.
Quite apart from the rolling landscapes and seascapes, most of the trains in diesel days seem to be composed of a minimum of four corridor coaches, often with added bogie vans. Previous Scottish inspiration though had included examples such as Ballachulish Ferry and Grandtully on the Aberfeldy branch, both being very simple single track passing stations, and eventually everything came together when plate 152 in George O’Hara’s wonderful BR Diesel Traction in Scotland, plate 152 showed the Moray Coast station of Portgordon in a way that definitely had that ‘something about that’ factor. Possibly the significant factor here, albeit one that wasn’t instantly obvious in my tortured mind, was that the NBL type 2-hauled train was composed of just two coaches. So from this, thoughts changed again, towards the eventual interpretation being something of a pastiche, a Coast Line-ish location but with shorter train formations.
The layout as was seen at Thirsk was obviously very much a work in progress, a sort of ‘operational demo’ really, with suitable descriptions and illustrations of what it will all look like when it’s finished and shown again next year.
Twixt Lossiemouff and Bannth…?
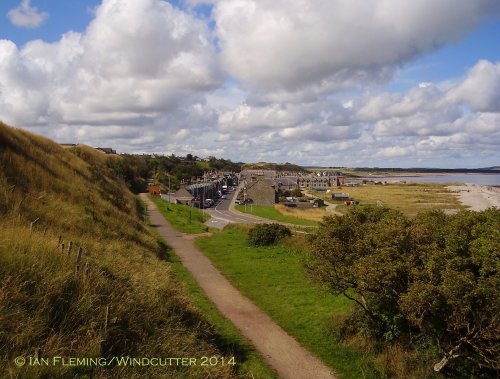
Looking east into Portgordon, this view shows how the line sat between the village at just above sea level and the rising ground going inland.
I did long ago set up a standalone blog for Blackhill, partly as an experiment with the Blogger platform, but my original ideas for that and to back it up with other Scottish material have been altered by various factors over time. And in any case, progress so far on Blackhill is not ideally suited to a blog, particularly as the concept is still evolving (which is a pretentious way of saying I’m making it up as I go along…).
Part of this ‘evolution’ is the supposed location. At the moment, given the considerations of train length detailed above, I think I see Blackhill not as being on the Coast line proper, but as perhaps the last station before the terminus on a third branch off the Coast line. That would render the short trains more plausible, and yet still redolent of the Scottish diesel era imagery that’s so prevalent in the common consciousness. Not that I’m deliberately perpetuating any myths here of course, oh no, not me…
So anyhoo, I shall refer you to this thread here on Modellers United for associated further ramblings. You can view MU without joining up as a member, although you wouldn’t be able to comment. Future development will be posted possibly here, possibly there and possibly in other media, although the precise details are something I’m as yet undecided about.
In the meantime, thanks go to Peter Simmerson for accomodating the layout at Thirsk, to Ken Gibbons and Brian Sunman for assistance with pointwork, wiring and other practical tasks during the runup to the show, and all those who’ve shown general interest and support. Also, the website of the Great North Of Scotland Railway Association is well worth a visit, being very probably one of the best of its type, and with the picture here being a large part of the inspiration for Blackhill.
Filed under Heritage diesels, Off the beaten track, Scottish railways
Modellers United
Further to last week’s post (now deleted), the forum is up and running after a successful domain change and should be locatable on the revised link below:
http://www.modellersunited.co.uk/
Apologies for the inconvenience, and thanks for bearing with us. We’ve been pleased to see an influx of new members over the last week; if hands on modelling, talking techniques and discussing aspects of the real railway sound like a refreshing alternative, do drop by 🙂
Filed under Uncategorized
Vanfare for the common man
No, not Vanwides again (one for those with long memories, that, though using the same heading twice in 19 years shouldn’t be stretching a point too much)! Rather, a few random-ish thoughts on the Vanwide’s more ordinary common cousin, the BR standard van.
At this point it’s almost obligatory in modelling circles to mention that whatever ‘standard’ thing it is that’s under discussion is anything but standard, and this is true enough of the BR van when you consider there are two materials used for the body sheeting and that the corrugated ends could be formed of two or three parts, each with further minor variations, all underpinned by the usual progression of brakegears and an extensive array of other running gear options. But I have an alternative take – from the less focused perspective of the operators, the people who’d roster them and load them, they were standardised. They were a basic covered box that was a given size and shape, and what the thing was made of and what type the buffers weren’t a concern to them, as long as they did their job.
Anyway, to the models. Like so many of the things characteristic of the post-war railway, we have a choice of representations of these vans, but made in such a way that not all can necessarily be run together, at least not without modification or a bit of thought. Hopefully what follows won’t shatter too many illusions!
As with so many wagon types, anyone starting from nothing can do little better than to assemble a selection of the current Parkside kits, PC07A/08A. Now I’m not going to just blog about that, I think most readers here will know of Parkside kits and that they virtually build themselves. But the current kit replaces a much older one, one that was one of the firm’s earliest offerings and was in essence an Ian Kirk design from the 1970s.
Although it was a welcome breath of fresh air at a time when little truly BR period was available, the van is like most of the Kirk production, quite basic and a little dimensionally dodgy. Most seriously, it’s a good 2mm or more too tall in the body, which alters the proportions quite significantly, and whereas considered on its own, this may not be an issue to some, it does stand out as soon as you sit it next to a more correct rendition and look at it at eye level. I first twigged this back in the mid-’80s when comparing the first one I’d built to that old favourite, the Airfix meat van. Whilst variation in all aspects is of course an intrinsic feature of a 1950s or ’60s van train, which would be composed of vans of all sorts of origins, after 1972 or so the BR vans were pretty much all there were, and the consequent uniformity in roof line when looking along a train is a very recognisable feature, just as it would be with a uniform rake of Mk1 or Mk2 coaching stock.
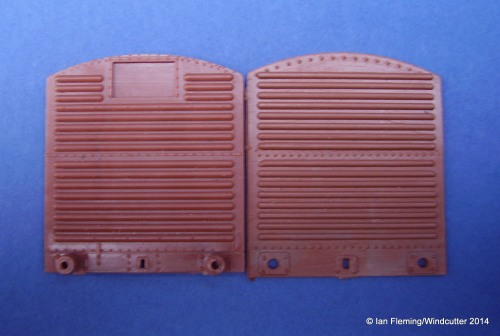
This comparison shot above is between a current Parkside end moulding and an old Kirk one (actually from an insulated van). I’ve positioned these so that the tops of the headstocks are aligned level, and from that, it can be seen that that’s actually where most of the excess is. This may be because the original Kirk solebars were quite crude and chunky by modern standards. I reckon there’s about a mill and a half in there, and although it’s not so obvious from the pic, there’ll be another 0.75 – 1mm in the corrugated end itself.
There are ways of dealing with this though if you have some of these kits and want to use them. The rake that inhabits Ken Gibbons’ various blue era layouts were produced from this basis by, simply enough, cutting them down as necessary; as seen here:
My own approach is one I’ve used before with superseded Parkside kits, by incorporating parts from the later and better kits. In this case, using spare ends of the current design, taken either from the Vanfit or Vanwide kits automatically produce the right height to set the sides at (in the same way as with the Parkside/Ratio hybrid shown in an earlier post, The LMS Van). Again these particular sides are (fairly obviously) from the insulated van, but the mouldings are identical (whereas Parkside’s current PC09 has a faithful portrayal of the differing door fastenings):
Although only obliquely visible, the chassis parts here are also later standard Parkside – a pair of PA16 solebars with plate axleboxes will acquire the 4-shoe brakegear from the current kit. The mismatched join in the corrugations needs some thought, and I also should come up with something just a tad more delicate for the brackets that the doors fasten back onto…
Before leaving the subject of these kits, one common misconception concerns the vans that had doors mismatched with the body sheeting. This variation is provided for in the retooled Parkside kits but unfortunately, the assumption is often that because the alternative parts are provided, they can be combined at will. Not so, unfortunately; whilst several thousand planked ones were built with plywood doors, the opposite combination is not thought to have happened (although some early standard Shocvans do have this arrangement, due to 1950s materials shortages, there’s no evidence of it on standard vans).
The reasoning behind this combination is something I discovered some years ago in some 1950s BR committee notes at the NRM. Apparently the original design of door had been causing damage to a particular user’s traffic, due to an internal gap into which loads could shift. To avoid this, a new design of door that eliminated the gap was put in hand. This new pattern of door was only designed in plywood, whereas the previous pattern of alternative body sheeting continued, producing some 4,000 or so vans with the mismatch.
A bit of more obvious variety doesn’t go amiss in an otherwise homogenous fleet, and one little known variant is the roof ribbing that appears in the first row of wagons here, behind the slave cab of D4500. I don’t know the reasoning behind this, but a small number of vans have it. The majority I’ve noted have been ply vans with 8-shoe brakes from a late batch that were signwritten for particular users but one other, an earlier 4-shoe ply, was written for Crosse & Blackwell traffic, so there may be some connection in the type of traffic carried. One of the three Lots of fruit vans based on the BR standard van also had this type of roof. Oh and whilst you’re perusing that Tinsley pic and taking in the wealth of wagonry scattered about, have a look at the van in the middle of the third row, between the 21T hopper and the Covhop … thoughts on a postcard perleeeze 🙂
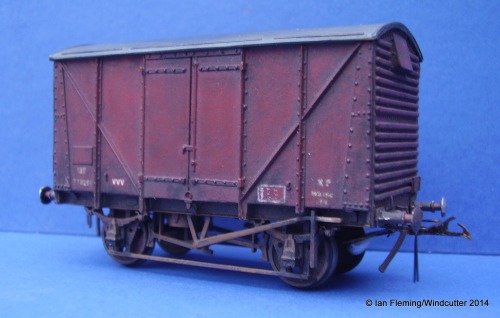
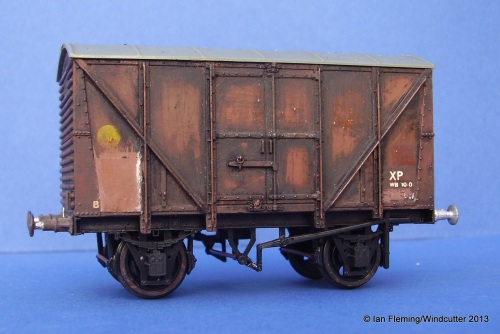
Another model that entered the mix back in 1985 was the David Boyle-era Dapol production. Again, it’s another one I like because despite its general chunkiness, it catches the proportions very well in my opinion. On the downside, the end vent is too small and the flat part of the diagonal bracing too deep; the broadside below shows how this has been carved off and replaced with thinner microstrip:
This van runs on the Red Panda underframe for the BR 8-shoe brakegear, with MJT self-contained buffers. It’s one that was done a while ago and ran in the initial Culreoch fleet, and is here awaiting slight relettering to suit the earlier ’70s.
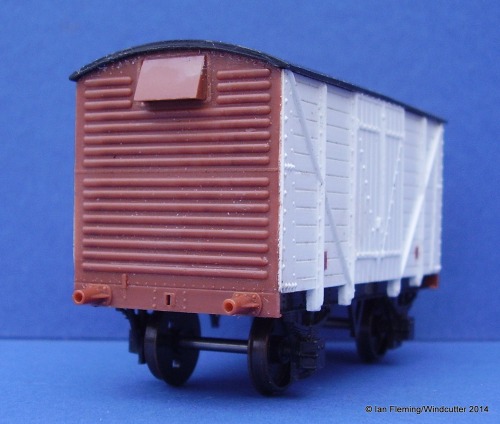
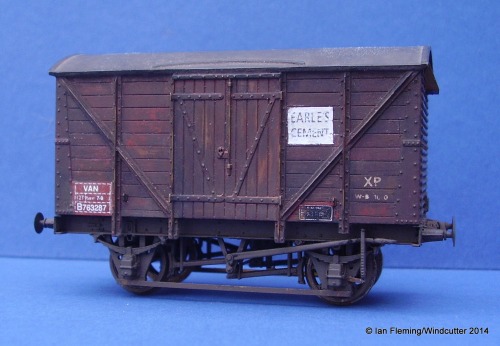
Moving on to a possibly less expected contender, I mentioned in the banana van piece that I had a soft spot for the old Dublo rendition of the BR standard. This might well be partly due to the number of the Wrenn derivatives that I worked on again back in the ’80s, and I still have a few of them together with one or two unpainted bodies. Despite its assorted shortcomings, I’ve always thought it caught the look of the type pretty well. The planking and diagonal bracing take a liberty or two but the main issue is with the roof curvature, which is a tad too sharp and more akin to a GW design van, together with the seriously undernourished bonnet ventilator.
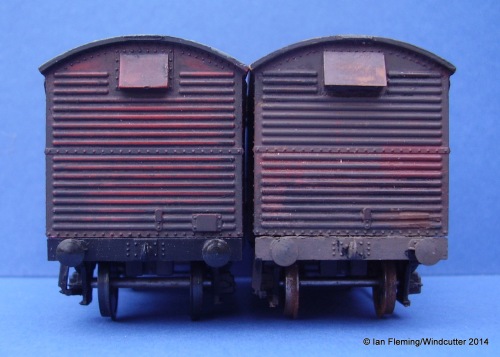
Another comparison then, but not between the Wrenn and a more correct model, but between unmodified (left) and modified (right):
Rebuilding the roof on a one piece moulding would obviously be a foolish thing to do, but my minimal mod here (which I also apply to the Dapol vans), is to use spare Parkside vents tweaked so that they overlay onto the existing vent. Whether the significantly greater width of the correct vent creates an optical illusion that ‘flattens’ the roof curve, or whether it’s simply the disguising one error that draws attention away from another, I’m not sure, but as a way of bulking up a rake without too much effort, I’m happy enough with it.
Incidentally the vents I use were obtained very cheaply some years ago, but it’s not the hardest job to knock them up yourself in plastic card. You’ll note that I haven’t restored the lost bolthead detail, which again is in line with the ‘quick and dirty’ ethos as the ends will be the part least visible. In which case, you might ask, why alter anything at all…
A side on shot of the modified van again brings in the theme of making the best of old models that have a decent finish. The current Bachmann 4-shoe chassis fits well enough and a selection of transfers and Hollar posters complete the impression. I still won’t run these vans next to a ‘correct’ BR standard, but as a short cut in a long mixed freight, possibly mixed with vans of pre-BR design, they should pass muster.
A model that might by now be conspicuous by its absence is the Bachmann RTR model, which to be honest I was a bit disappointed with when it appeared. Some of the contemporary criticism focused on the thickness of the ironwork, which is something I tend not to fret about. More of a concern to me was that I could see from side by side comparisons with other stock (both vans and other types) that the proportions just weren’t right somehow. I’ve never fully analysed it but I think it’s a combination of a slightly tall chassis (not uncommon in RTR) with maybe up to a millimetre shortness at the eaves. It’s a shame, it was a model I really wanted to like because like all Bachmann stock, the liveries and lettering are well observed and nicely applied. Not a major issue though in the bigger scheme of things, it won’t matter at all to many users and it has to be said that it’s a rare blip in a range of freight stock that overall just goes from strength to strength.
And finally, purely for the sake of completeness, I should mention the Lima model of the standard van. About which I’ll say no more than that there was one.
Filed under Vans, Wagon kits
Bananarama
Last one for this year then, and one that ties in two themes: unfinished projects (not in short supply around these parts…), and the Hornby Dublo ‘Super Detail’ range of freight and NPCC- stock from the 1960s and later passing to Wrenn.
Though often talked of in hallowed tones, the range was to be honest a bit patchy in terms of authenticity (although it was in a rather different class to what Triang were producing at the time)! The High Goods opens (a generic 5-planker and its more recognisable steel equivalent) were very much out of proportion, the cattle van was also too tall and the 20T grain hopper was cut short to fit the same chassis. I have a soft spot for the BR 12T van though, which manages to catch the general look quite well despite having a roof profile much more akin to the GW Minks. The Fruit D, Presflo and Prestwin are decent body mouldings but suffer from poor chassis, although things did get much better with the plastic underframes on the SR CCT and the Blue Spot fish van featured in a recent post.
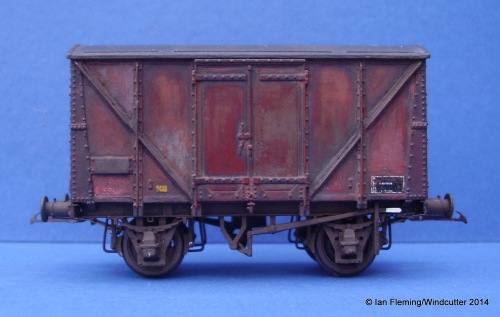
This one here though, the BR banana van, is in my opinion the best item in the range as regards its ‘finescale’ potential (although that observation only applies to the body). The detail is relatively restrained and it’s dimensionally spot on apart from about 1mm overwidth, and it matches up well with the Dapol and Parkside renditions of vans based on the BR standard 12T design.
Detail wise, it’s rather marred by the raised ‘pad’ on which HD printed the code and running number – that’s been shaved down on this one, but it’s not yet had the smaller details restored, which will be done with microstrip and 10 thou ‘cube rivets’. Hacking something about to this degree may seem daunting, but as long as you have some skill with the knife and file and take it a bit at a time, constantly checking levels, it repays the effort. It’s also an idea to cut in the edge of the corner plate before you start, following the line set by the higher part of the moulding, as it will help to prevent the knife wandering too far. This particular model is another that was originally weathered contemporaneously with that Blue Spot and again, is a good enough basis for a bit more work.
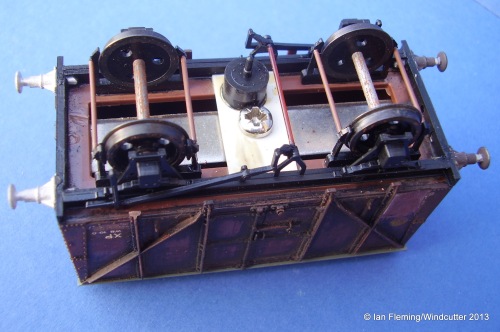
Most of all the model is let down by the standard crude diecast chassis, but an easy upgrade is possible with the Red Panda mouldings for the BR standard 8-shoe clasp gear. As these vans didn’t appear until quite late on, it was what they were all built with (other than a solo prototype converted from a plywood Vanfit, B769635, which may or may not have kept its 4-shoe gear).
This was done back in my methodical period, having the patience to think ahead and planning the chassis build so it could make use of the way the Wrenn van was constructed. The steel weight was retrieved from a RTR wagon and is one of those with a hole in the middle, chosen so it accommodates the screw post that is actually part of the separate roof moulding. The weight itself is just glued at each end to the lips on the body moulding, and the main chassis members similarly just sit on the partial floor.
For those new to kitbashing or teetering on the edge, this sort of procedure is actually very little different to building up the chassis in a bespoke, prepackaged kit; you still have to dress the top edges and make sure things sit straight, you just don’t have anything pre-set to determine the distance between the solebars. I tend to fit the headstocks first, which naturally gives some idea where the solebars should sit, and then just fiddle about with a light tack joint of solvent and eying things up until I’m happy the wheelsets aren’t going to drop out. It also still needs catch bars from brass wire adding to the representational yokes, which I expect I’ll have to bend in such a way as to be secured inside that body lip. All that will happen once I’ve made progress on one or two others to run with it.
So there you have an interesting project, one that could be relatively quick (unlike mine…) and that provides something as yet untouched by the wishlists. The Wrenn vans can be picked up relatively cheaply around the swapmeets and I think it’s also one of the unpainted bodies that Dapol are knocking out for a quid, and the Red Panda chassis is still in the Parkside Dundas catalogue. Prototype wise, these vans were in service from the late 1950s until sometime in the mid-’70s; I think one or two survived to wear the TOPS code VNV although by then, most survivors were in use as barriers. For earlier years (steam and early diesel), they could be regularly seen in combination with the LMS-inspired design represented by Ratio kit 541 .
Filed under Perishables, Vans, Wagon kits, Wagon weathering
The next Bee Pee?
The ubiquitous MetCam has already been the subject of two RTR models, with a third one nearly upon us from Bachmann. Is the Trans-Pennine waiting in the wings, or lost amongst the shadows?
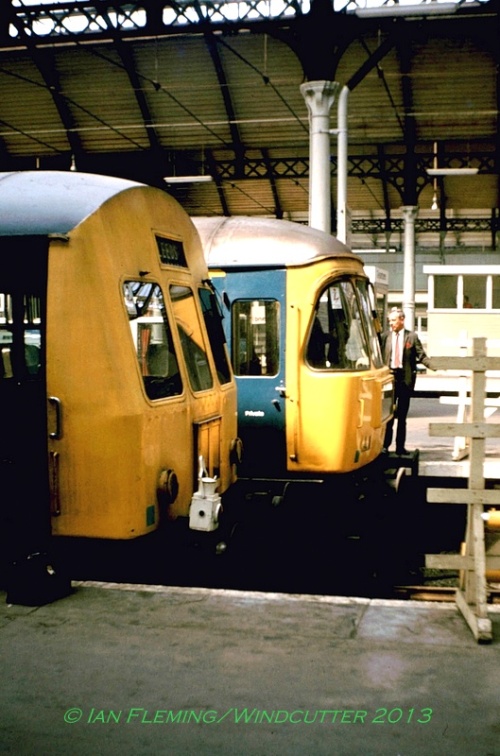
To anyone of my generation, the current availability of 4mm scale RTR DMUs is a far cry from the tokenism of the Hornby and Lima ranges in the 1980s. There’s still a way to go of course, lots more classes and unexploited potential, but like all things you’d expect a natural limit to what’s sensible and viable. For a while now though, I’ve been quietly amazed at just how often the Trans-Pennine, the eponymous unit of my username, crops up in the wishlists.
Now I literally grew up with these things; I saw them almost daily, rasping in and out of Paragon or being serviced at Botanic Gardens depot, which was right at the end of the street. I travelled on them as well of course, to Leeds and further afield, and generally we headed straight for the compartment accommodation in the MBS, which set them apart from lesser units. I once absent-mindedly walked off and left a transistor radio in one of these, on the early train to Liverpool which stood at Leeds City for 45 minutes; we got back from our morning stroll round the concrete cavern to find it still playing away on the wee table under the window! I remember the arrival of the mechanically-similar WR class 123s from the WR, the 1979 timetable recast that saw them formed into 17 ragbag hybrid units for services to Lancaster and via Sheffield to Manchester, and taking photos of them on the last weekend in 1984.
Despite this though, I would always have classed them as a bit of a niche interest. Whether rightly or wrongly, I get a tad proprietorial about them whenever I get that feeling (one that will be familiar to many at the thinking end of the hobby), when you sense somebody clearly doesn’t have the first idea what he’s wishing for!
There is logic though, of sorts, in the wishlist requests – if Bachmann eventually get around to the BRCW class 104, the viable short frame designs will have been exhausted and thereafter, long frame sets would appear to be the growth area. The various Inter-City sets were a step up from the Cross Country units, generally similar in ambience and appointments but of stronger construction. By the very nature of their specification and relative scarcity, they tended to be restricted largely to the routes for which they were built and one or two others. Added to that, the early Inter-City sets were not known for their looks, whereas the ‘Pennines’ benefitted from the attention of the same designers that produced the Glasgow electric ‘Blue Trains’. It was only the addition of gangways throughout that slightly marred the later class 123s in that respect, though at the same time it gave them a unique character of their own.
If long frame sets do appear, the smart money has always been on either a Cross Country set or a high density suburban set. The former would almost certainly be the Swindon class 120, very widespread in usage over a longish career, with the tandem possibility of the GRCW 119 as the cherry on the cake. As to the suburban units, all too often that slot is seen as being fulfilled by an updating of the old Lima Pressed Steel class 117; I see this as particularly flawed thinking though because until very late in its life, the 117 was restricted to the WR plus rather small bits of the SR and LMR. The earlier Derby-built 116 would have much more potential and I can only conclude that the calls for a 117 arise from that unfortunate phenomenon of people being aware of models because of other models, rather than knowledge of real live trains .
But just what is it about the Pennine? Is it just its looks, and if so, can it really be considered as an iconic train in the same way as the Blue Pullman? Maybe I’m blinkered by familiarity and adolescent contempt, but I just don’t see it. Maybe again it’s that ‘collective unconscious’ that seems to underpin the hobby, based on fond recollections of the 1960s Trix model of the type.
But the Trix model wasn’t really a full unit; the intermediate coaches were just reliveried versions of their standard Mk1s, and that sort of thinking doesn’t cut it these days. A significant consideration in tooling up for a unit like this is that a full six-car class 124 set includes three different coach types. There’s a motor composite at each end, a non-driving motor brake second next to each of those, and then the trailer second and trailer buffet in the middle. Add in the class 123s (as many are wont to do), and you add at least another four to the mix (I’m including the buffets here, which were withdrawn quite early, but being generous by deeming the TSLs to be similar to the 124 TSLs apart from the bogies). The early days of the Bee Pee debate on the forums were marked by a gulf in understanding of this very nature – there were those who knew the makeup of the sets, and others who apparently thought you could ‘do a Triang’ and just bung in additional generic ‘centre cars’ (sic) to taste…
There’s also a debating point around the theory that longer DMUs and EMUs are not good sellers, and that two- and three-car sets are more or less the sensible limit. I wouldn’t like to call that one either way – the Bachmann 4CEP evidently did well enough, and obviously their Bee Pee is a six-car set – but then again it’s an inescapable reality that a six-car set is in very general terms likely to cost double what a three-car does. And the Bee Pee, like the prototype Deltic, is undeniably a model with a ‘wow’ factor and that transcends normal considerations. So for now at least, the Pennine is the province of the hardcore conversionists like Sean Hughes and Paul James, and even if further DMUs do appear RTR, I honestly don’t see either class 123 or 124 being very high on the list. Though I’d love to be wrong!
Anyway, in the midst of the frothing season, that seems an appropriate note on which to close. Once again after another year, my thanks and the compliments of the season to all who follow, pass comment or just drop by and browse.
Filed under DMUs, Heritage diesels




You must be logged in to post a comment.